

Key Takeaways
- Match your patching method to the hole size - small, medium, and large repairs each require a different approach.
- Joint compound must dry fully between coats; rushing this step leads to cracking and shrinkage.
- Feathering compound edges and sanding between coats is the key to a smooth, invisible finish.
- Priming the patch before painting prevents sheen differences that expose the repair.
What you will need
Why Drywall Damage Happens - and What You're Working With
Drywall - also called gypsum board or sheetrock - consists of a gypsum plaster core pressed between two layers of paper. It's resilient for everyday living but vulnerable to impact, moisture, and hardware stress. Understanding what you're patching helps you choose the right materials and avoid repeat repairs.
Common causes include doorknobs swinging into walls, furniture impact, fasteners pulling loose over time, and plumbers or electricians cutting access holes. Each leaves a different type of damage - a clean punch-through, a ragged tear, or a surface pop - and each responds best to a matched repair method.
What you will need
One important note: drywall repair is forgiving for DIYers, but the finish work - sanding and feathering compound - is where most first-timers struggle. Allow yourself enough time and don't rush the drying process. Compound that looks dry on the surface may still be wet underneath, which causes cracking when you sand or add the next coat.
Check for Hazardous Materials First
Homes built before 1980 may contain asbestos in drywall joint compound or lead in paint layers. If your home is in this age range, consider having suspect materials tested before sanding or cutting into walls. Disturbing these materials without proper precautions can pose a serious health risk. Contact a licensed abatement professional if testing results are positive.
What You'll Need Before You Start
Having the right tools within arm's reach before you open the compound makes the process much smoother. The list varies by hole size, but the essentials below cover all three repair categories.
Putty knife or drywall knife (4-6 inch)
Applies and smooths joint compound over small and medium patches.
Wide drywall knife (10-12 inch)
Feathers compound over larger areas to blend the patch invisibly.
Utility knife
Cuts drywall cleanly when enlarging or squaring off damaged areas.
Self-adhesive mesh patch or drywall patch kit
Bridges medium holes (1-4 inches) without requiring backer boards.
Drywall backer boards or furring strips
Provide structural support behind large holes before screwing in a new drywall piece.
All-purpose joint compound (pre-mixed)
Fills, coats, and finishes patches of all sizes.
120- and 220-grit sandpaper or sanding sponge
Smooths dried compound between coats and before painting.
Drywall primer
Seals the porous patch so paint applies evenly and matches the surrounding wall.
Step-by-Step Repair Instructions
Follow the steps below in order, selecting the method that matches your damage size. Steps 2, 3, and 4 are each specific to a hole-size category - skip directly to the one that applies.
Assess and Categorize the Damage
Before gathering materials, identify which repair category your hole falls into:
- Small (under 1 inch): Nail holes, screw pops, and minor dings. These need only spackling paste or a thin coat of joint compound.
- Medium (1-4 inches): Doorknob dings and accidental punctures. A self-adhesive mesh patch or peel-and-stick plate works well here.
- Large (over 4 inches): Fist-sized or contractor-cut holes. These require a cut-and-replace method with backer support.
Also check for any underlying cause - a water stain ring or soft drywall indicates moisture that must be resolved before patching.
Repair Small Holes (Under 1 Inch)
Clean the area by scraping away any loose paper or crumbled gypsum with your putty knife. Apply a thin layer of pre-mixed joint compound directly into the hole, pressing firmly so the compound fully fills the void. Draw the knife flat across the surface to level it flush with the wall. Let dry completely - typically 2-4 hours depending on humidity. Lightly sand with 220-grit paper, then apply a second thin coat if needed. Sand again once dry.
Repair Medium Holes (1-4 Inches)
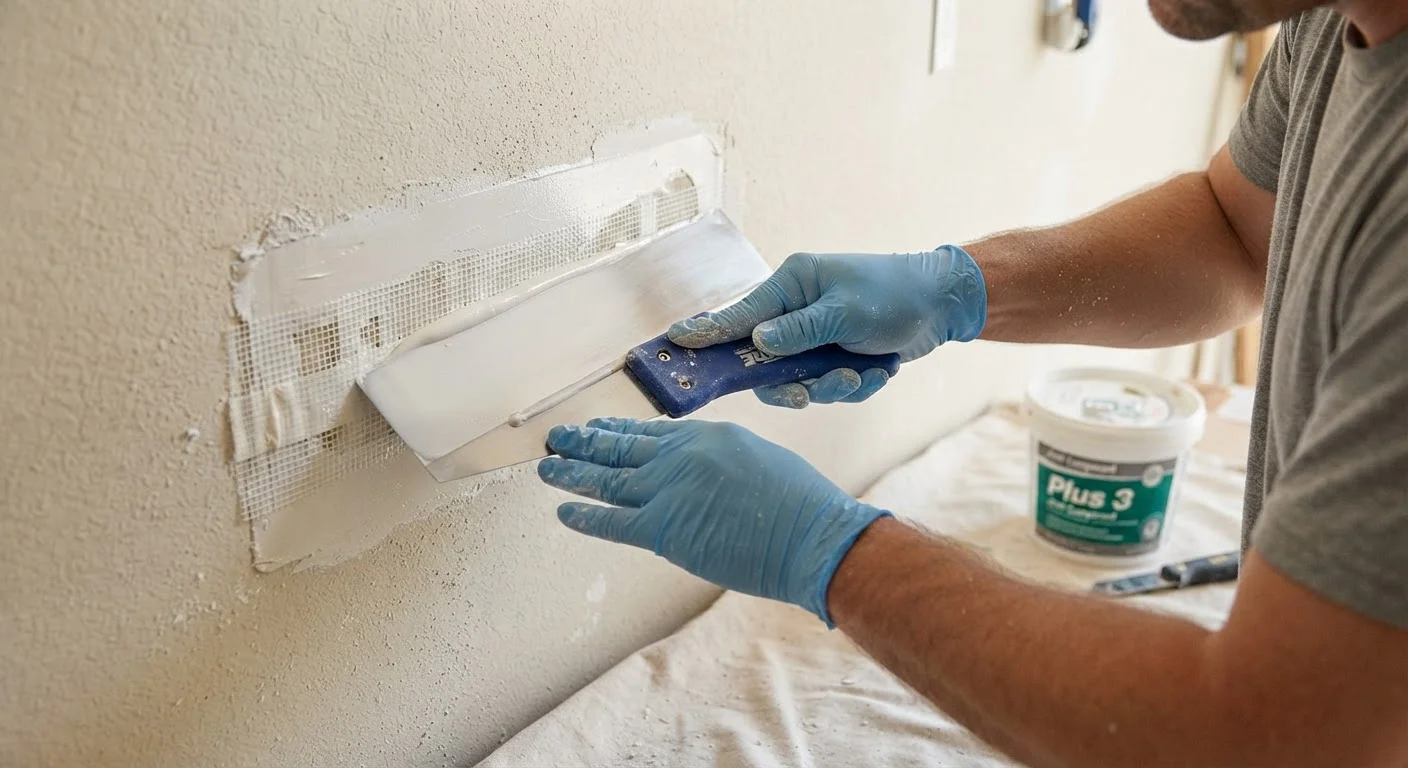
Cut away any jagged or torn paper edges with a utility knife until you have a clean hole outline. Peel and apply a self-adhesive mesh patch centered over the hole, pressing firmly so all edges adhere. Apply a coat of joint compound over the mesh using a 6-inch knife, working compound into the mesh openings. Spread the compound about 2-3 inches beyond the patch edges. Allow to dry fully, then sand lightly with 120-grit paper. Apply two additional thin coats, using a wider 10-inch knife each time, feathering edges outward 6-8 inches. Sand with 220-grit after the final coat.
Repair Large Holes (Over 4 Inches)
Use a utility knife and drywall square to cut the hole into a clean rectangle. Cut two furring strips or 1×3 boards several inches longer than the hole height. Insert each strip into the hole and position them behind the left and right edges of the opening, then drive drywall screws through the existing drywall into the strips to anchor them. Cut a replacement drywall piece to fit the rectangle exactly. Screw it into the furring strips using drywall screws placed every 6-8 inches. Apply joint compound over all seams and screw heads, embedding paper or mesh tape into the first coat on the seams. Feather with successive coats as you would for a medium patch.
Sand, Prime, and Paint the Patch
Once the final compound coat is fully dry and the surface feels hard to the touch, sand the entire patched area with 220-grit paper using light, circular strokes. Run your hand across the surface - it should feel level with no ridges or bumps. Wipe away all dust with a dry cloth. Apply a coat of drywall primer to the patch and let it dry per the manufacturer's direction. Without primer, fresh compound absorbs paint differently than the surrounding wall, leaving a dull spot called flashing even after multiple paint coats. Finish by painting to match the existing wall color and sheen.
Getting the Finish Right Every Time
The visible quality of a drywall repair depends almost entirely on the finish coats and surface preparation - not the structural patch itself. A perfectly anchored backer board means nothing if the compound is uneven or the paint isn't primed first.
Three-Coat Rule for a Smooth Result
Professional finishers almost always apply three coats of joint compound: a filler coat, a second blending coat, and a thin finish coat. Each coat goes on wider than the last. Skipping coats or combining them into one thick application leads to shrinkage cracks and visible seams. Patience here pays off visibly.
Texture matching is the one area where DIYers sometimes need extra patience. Smooth walls are relatively forgiving. Textured walls - orange peel, knockdown, or skip-trowel - require recreating the pattern before painting. Practice the texture technique on a scrap piece of drywall or cardboard first. Many spray-can texture products are available at hardware stores and can approximate common wall textures reasonably well, though achieving a perfect match on heavily textured surfaces can take a few attempts.
If your repair area is large or you're preparing to repaint an entire room, consider skim-coating the whole wall surface for a uniform result. This involves applying a very thin layer of compound across the entire wall, which levels minor imperfections and gives fresh paint an even base to adhere to.