
Zones, Bins, and Labels: Building a Storage System Your Whole Family Will Actually Use

Key Takeaways
- Dividing your home into activity-based zones is the foundation of any durable storage system.
- Containers and bins reduce decision fatigue by giving every item a defined, physical home.
- Labels do the real work - they make the system self-explanatory for every family member.
- Involving the whole family in setup increases how consistently the system gets used.
- A short weekly reset habit prevents clutter from quietly rebuilding over time.
What you will need
Why Most Home Storage Systems Break Down
Most organizing attempts fail not because people lack effort, but because the system was designed for one person's mental map. When only the person who set it up knows where things belong, everyone else defaults to the nearest flat surface. The result is a tidy home for about two weeks, then a slow slide back to baseline chaos.
A storage system that sticks has three things working together: zones that reflect how your household actually lives, containers that make categories physical and visible, and labels that remove all guesswork. If you're not sure where to begin assessing your home before building a new system, our room-by-room organization audit offers a practical checklist for identifying clutter hotspots and storage gaps room by room.
This guide walks you through each layer - zones first, then containers, then labels - so the finished system is intuitive enough for a six-year-old and consistent enough to survive a busy school week.
What You'll Need Before You Start
Gather your materials and set aside a realistic block of time before diving in. Trying to organize one drawer at a time without a broader plan often produces piecemeal results that don't hold.
What you will need
Measuring tape
Measure shelves and cabinets so containers fit the available space without wasted gaps.
Assorted bins and containers
Create physical boundaries for each category within a zone so items have a defined home.
Label maker or printable label sheets
Produce clear, readable labels that make the system self-explanatory for every family member.
Permanent marker
A low-tech fallback for labeling bins or writing directly on masking tape labels.
Masking tape
Temporary labeling during the sorting phase before committing to permanent labels.
Sticky notes or index cards
Map out zone layouts and category groupings on paper before moving physical items.
Step-by-Step: Building Your Zone-Bin-Label System
Work through the steps below in order. Each builds on the last, so skipping ahead to labeling before you've sorted containers rarely produces a coherent result.
Map Your Zones Based on Activity, Not Rooms
Walk through your home and note what actually happens in each area - where homework lands, where sports gear piles up, where mail accumulates. A zone is an activity area, not necessarily a discrete room. A mudroom, a section of a hallway, and a corner of the garage can all be part of the same "gear-in, gear-out" zone if that's how your family moves through the house.
Sketch a rough floor plan on paper and draw circles or rectangles around each activity cluster. Aim for no more than four to six primary zones per floor to keep the system manageable.
Sort Items Into Categories Within Each Zone
Empty out one zone at a time and sort every item into categories. Use the floor, a table, or temporary masking-tape sections to keep piles separate. Common categories include: daily use items, occasional use items, seasonal items, and items that don't belong in this zone at all.
Relocate any misplaced items to their correct zone before moving forward. Items that belong nowhere - things nobody uses and nobody wants - are candidates for donation or disposal rather than storage.
Choose and Size Your Containers
With your sorted categories in front of you and your measurements in hand, select containers that fit both the shelf dimensions and the volume of each category. A good rule of thumb: bins should be full enough to look intentional, but not so overstuffed that lids don't close or items tumble out when retrieved.
Use consistent container styles within a zone for a visually cohesive result, but prioritize function - a mix of open bins for frequently accessed items and lidded boxes for seasonal or occasional-use categories is often the most practical approach.
Label Everything - Including the Shelves
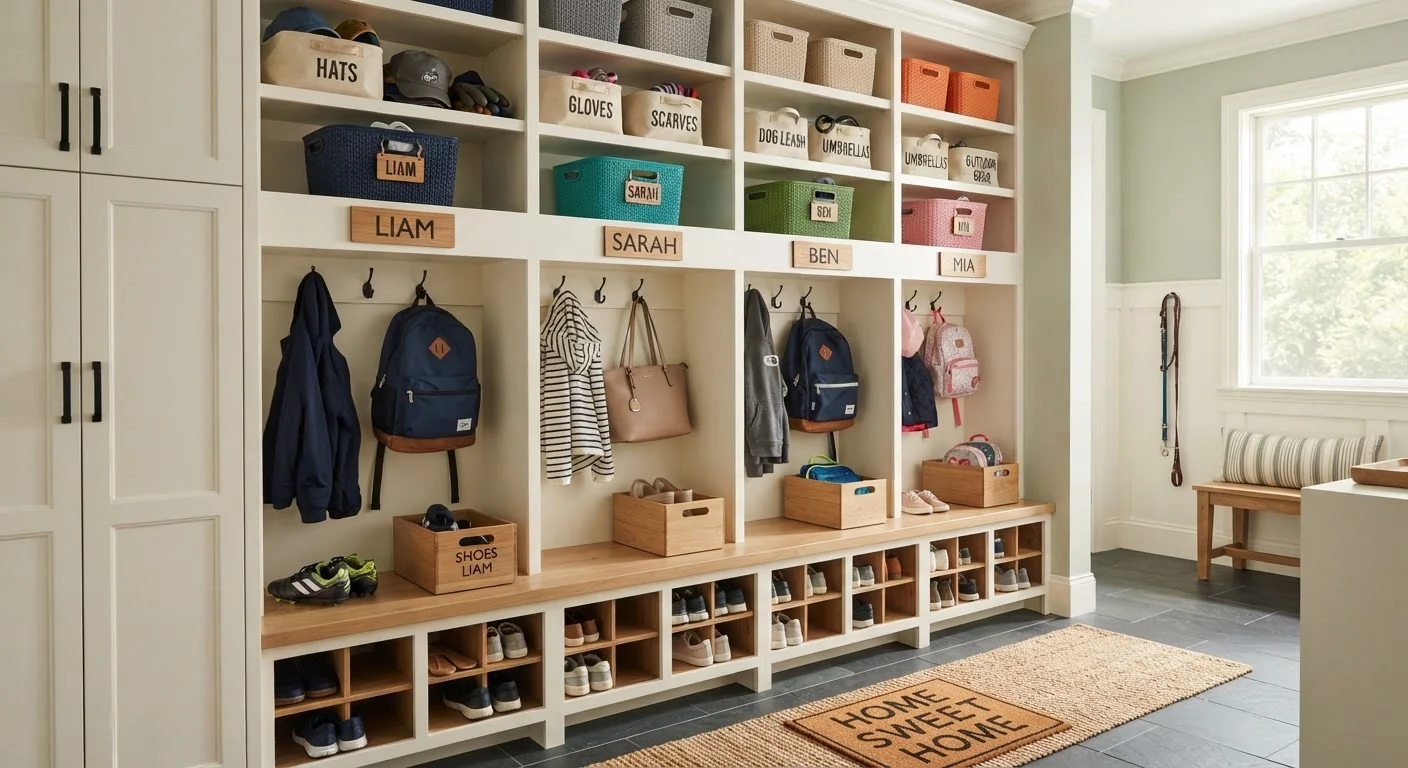
Label each bin clearly with its category name. For households with young children, supplement text with simple icons or pictures. Label the shelf or wall space behind each bin as well - this is the detail most people skip, and it's the one that makes returning items foolproof even when bins have been pulled out and rearranged.
Keep label language simple and specific: "Art Supplies" works better than "Craft Stuff"; "Soccer Gear" works better than "Sports." The more specific the label, the less interpretive work each family member has to do.
Walk the System With Your Household
Before calling the project finished, spend ten minutes walking every household member through the new layout. Show where each zone starts and ends, what each bin holds, and - critically - how items get returned, not just retrieved. For younger children, run a short practice round: hand them an item and ask them to put it away.
This walkthrough is not a lecture - it's an onboarding. The goal is for every person to feel confident navigating the system independently from day one.
Color-Coding Adds a Visual Layer
Assigning a color to each family member - a blue bin for one child, a green bin for another - reduces sorting conflicts and makes ownership immediately visible without reading a label. This works especially well in shared spaces like mudrooms, bathrooms, and playrooms. You don't need to buy all-new containers; a stripe of colored tape on existing bins achieves the same effect.
Adapting the System for Different Rooms and Family Needs
The zone-bin-label framework scales to any space, but the specifics shift depending on the room and the people using it. In a garage, zones typically organize around large activity categories - automotive, yard tools, sports equipment, seasonal decor. Our garage organization playbook covers how to apply zoning principles to one of the most challenging spaces in the home.
When children are involved, the system needs to meet them where they are. Bins at accessible heights, picture labels alongside text for pre-readers, and color-coding by family member rather than category are all adjustments that help. The organizing with kids guide goes deeper on age-appropriate strategies that hold up in real households.
For rooms with limited floor area, think about whether your bin placement should go vertical rather than horizontal. Vertical versus horizontal storage is a meaningful choice room by room, and getting it right maximizes usable space without making a room feel cramped.
Don't Over-Organize Rarely Used Spaces First
It's tempting to start with a room that's already relatively tidy because the wins feel faster. Prioritize the spaces that cause the most daily friction for your household - entry areas, kitchens, and homework stations - before tackling guest rooms or storage-only closets. A well-organized low-traffic space won't meaningfully reduce household stress if the high-traffic zones are still chaotic.
Maintaining the System Over Time
No storage system maintains itself. What separates a lasting system from a temporary one is a short, regular reset habit. A ten-minute weekly sweep - returning stray items to their zones, checking that bins haven't been repurposed, and refreshing any damaged labels - is far more effective than occasional marathon organizing sessions.
Hold a brief family check-in every month or two to ask what's working and what isn't. Kids' needs shift as they grow, and household routines change. A system that earned buy-in at the start will earn continued use only if people feel they can flag problems and see adjustments made. If the whole project feels overwhelming at the outset, getting started with home organization offers a friendly, structured introduction with realistic first steps.